I finally got into Serverless Computing by using Azure Functions. In this blog post, I want to tell you everything you need to know to create your first Azure Function.
As I am a .NET developer, I am going to use C# for the code, but you can use other languages, including JavaScript too. The code for your first Azure Function app will be simple anyway.
The goal of this blog post is to get you up to speed with Azure Functions App as fast as possible.
Prerequisites
I assume that you are familiar with the Microsoft Azure portal and that you have access to a Microsoft Azure account. If that’s not the case, you need to create an account right now.
If you’re an enterprise developer, the chances are that you can log in with your Microsoft account associated with your employer. It’s also possible that you have access to FREE Azure credits with this account depending on the subscription level of your employer.
Other than that, you don’t need to have any knowledge about Azure Functions. I also did not know anything about it before I tried it a few days ago.
The Basic Concept of an Azure Function
Before we jump into the code, let’s take a quick look at how an Azure Function works, so that we have a basic understanding of what we’re going to build.
An Azure Function is Microsoft’s implementation of the serverless concept, which means that you write a simple function which does a specific task.
You don’t need to worry about the infrastructure like starting a web app or even running on a web server. The platform takes care of everything else. We only need to write our business code.
A Microsoft Azure Function App can include multiple functions, which all can be run using different triggers.
Create a Function App in the Portal
We now know about the basics of how an Azure Function App works. Let’s start with opening the Azure portal in the browser and create a new Azure Function App resource.
In the Azure portal, we click on the Create a resource button on the top left and choose a Function App resource. We are promted to name the Function app, to select a subscription, to choose a resource group, and to select an App service plan.
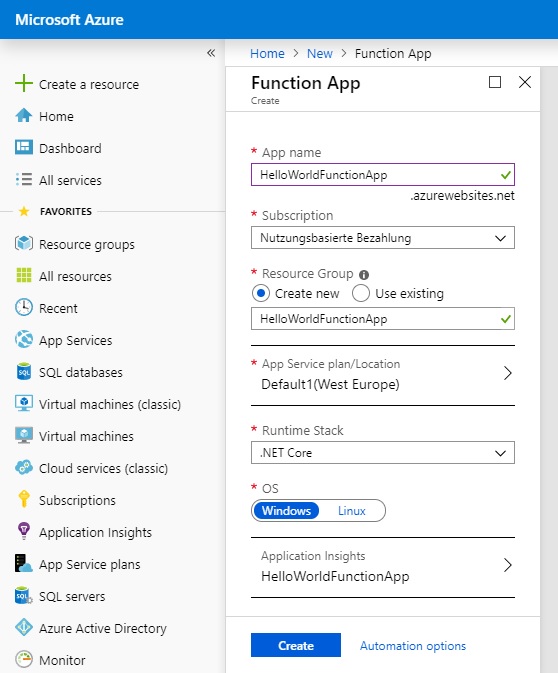
According to the official documentation, it should also be possible to choose the consumption plan instead of an App service plan for your Function App. Unfortunately, this option is not available on my account.
I have an open question posted on Stackoverflow, and if you know why this option is not available for me, please answer the question. I’ll make sure to mention whoever will help me figure this out.
Nonetheless, it’s not that important for creating the first Function app. I just wanted to let you know that your screen could have another option that is not visible on the screenshot above.
When you’ve entered all the required information, click on the blue next button.
It only takes a couple of seconds to create the resource.
Create the First Function in the Function App
When the resource is available, open it in the Azure portal. Your screen should look like the screenshot below.
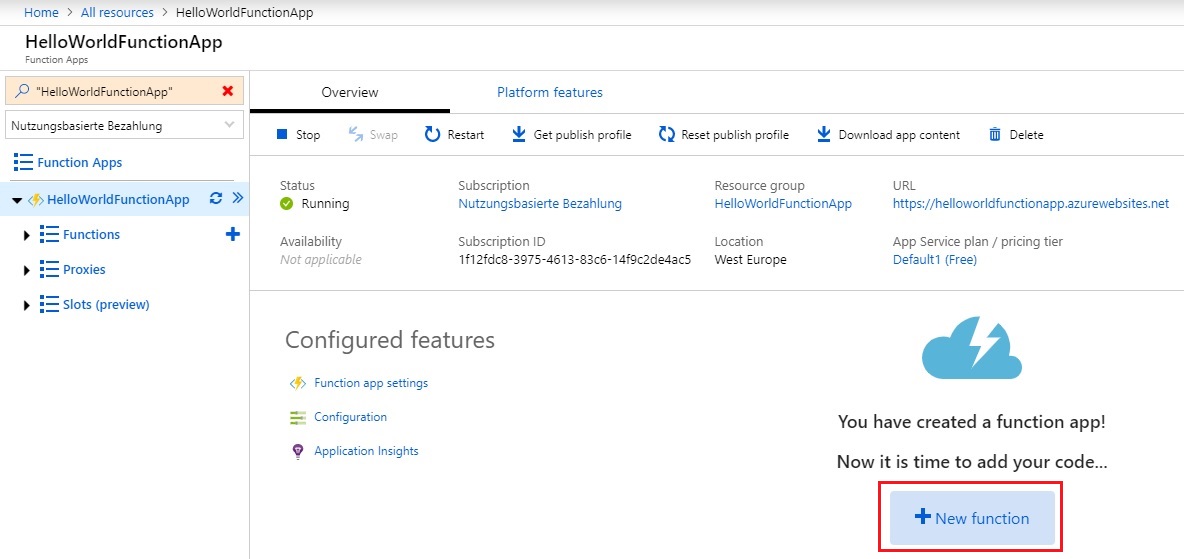
In the middle of the screen, there is a big New Function button, which we need to press to create our first function within the Function App.
Choose a Programming Environment
There are various options for how you can write your Azure Function. The goal of this article is to create your first Function App as quickly as possible.
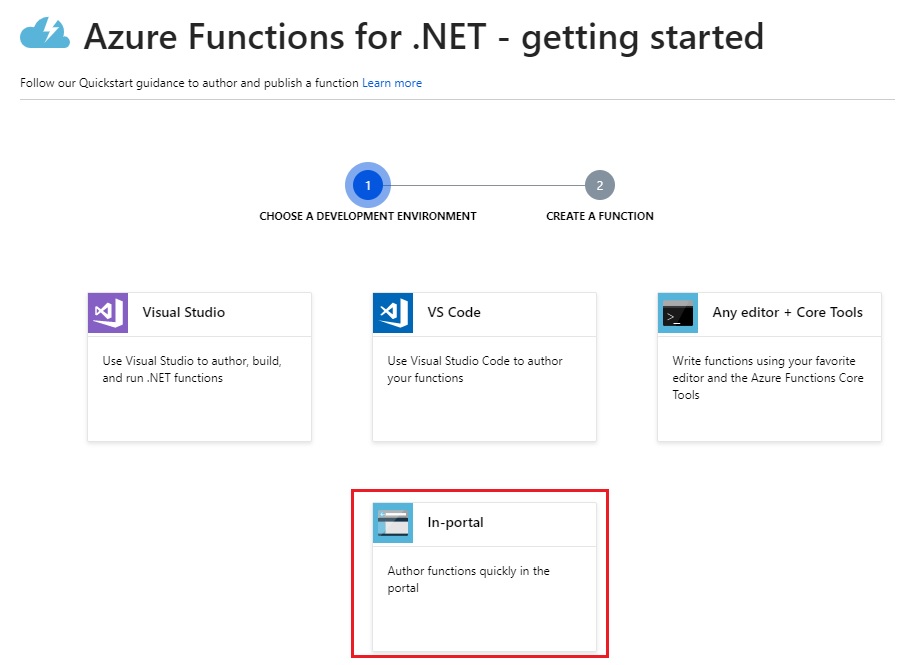
Therefore, we choose to write the code directly in the Azure portal. It’s the most basic option with the least tooling support, yet it’s the fastest option to getting started.
Next, we need to choose the trigger for our function.
There are several different triggers available, which all can execute a function. We start with an essential trigger, which is the HTTP trigger. The HTTP trigger triggers the function whenever a specific URL receives an HTTP request.
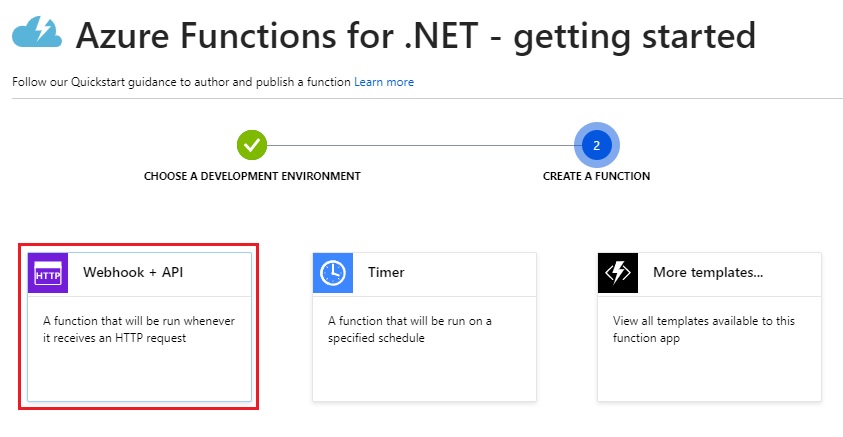
The HTTP trigger has different names and at the time of writing this article, when creating a new function its called Webhook + API. Select this option and click on the blue Create button.
A function called HttpTrigger1 will be created. In case you want to change the name of the function, take a look at this Stackoverflow question.
Taking a Look at the Code
When our first function has been created, there is already code in the function. Microsoft provides us with some template code. The good news is that the function is ready to be executed. The bad news is that in my opinion, it’s not the most straightforward Function implementation.
As we want to start as basic as possible to build our foundational understanding of how everything works, we want to replace the template code with the following function definition:
using Microsoft.AspNetCore.Mvc;
public static IActionResult Run(HttpRequest req, ILogger log)
{
    return new OkObjectResult("Hello World!");
}
Make sure to press the Save button, after you copy & paste the code snippet above into your portal.
Now that we have our code in place let’s execute our function for the first time.
Executing the Function
The portal offers us two options on how to execute our function. The first option is to use the built-in test feature. You can find it on the right-hand side within the Azure portal.
- You can press the Run button to execute the function within the portal, and you’ll receive the return value of the function in the output window on the bottom right of the screen.
- The second option is to get the URL of the function and copy & paste it into another browser window. You can the the URL of your function by clicking on the “Get function URL” hyperlink next to the Run button above the code editor.
Depending on whether you execute the function in a new browser tab or within the Azure portal, you receive the output of the function in the corresponding place.
It does not matter which approach you choose; you should be able to see the Hello World string in the output.
What to Learn Next
The next step will be to understand how to pass data into the function and how to return more sophisticated data than a simple Hello World string. I’ll cover that in the next blog post.
If you want to learn more about Azure Functions take a look at the official documentation, and subscribe to the Weekly .NET News. It’s the best way to make sure you don’t miss it when the next article in this series is available.
Let me know in the comments below about your experience with Azure Functions, and if this article helps you get started with Azure Functions.
I would also like to know if you think that this technology has the potential to help you solve some of your problems.


