
In this article I am going to show you how simple it is to deploy a WCF service on Windows Azure. When I did it for the first time, I had only about 45 minutes to deploy my first service. Remember it is completely free of any cost. I highly recommend to try it, if you haven’t before. It will give you some basic understanding of what you need to do to deploy a service to the cloud using the Microsoft technology stack.
Prerequisites
To use this tutorial, you need to have Visual Studio 2012 installed. I used the Ultimate edition to create this tutorial, but I am sure it works the same with the express edition.
Creating a Windows Azure account
If you don’t already have a Windows Azure account it is now the time to create one. To do so, go to WindowsAzure.com and use the free trial link on the upper right corner of the website. There is currently a special offer which allows you to try some things for free, which you normally would get charged for. But for this tutorial we will only use configurations which are free of any costs.
While creating your account, you’ll be asked for some credit card information. If you don’t use any paid services, your credit card won’t be charged. Microsoft requires this information only for verification purposes. But if you start using some paid services, your credit card will be charged, so be sure to provide correct information.
Download and install the Windows Azure SDK
The next step after creating a Windows Azure account is to configure your development environment. This includes downloading and installing the Windows Azure SDK. This kit is required to get the project templates and the dlls required to develop cloud services for Windows Azure.
Create a new Windows Azure Cloud Service project
Now you have all things prepared to create your first Windows Azure Cloud Service project. To do so, start Visual Studio and open the new project window via the File – New – Project… menu.
Select the cloud tab and you will see the following screen:
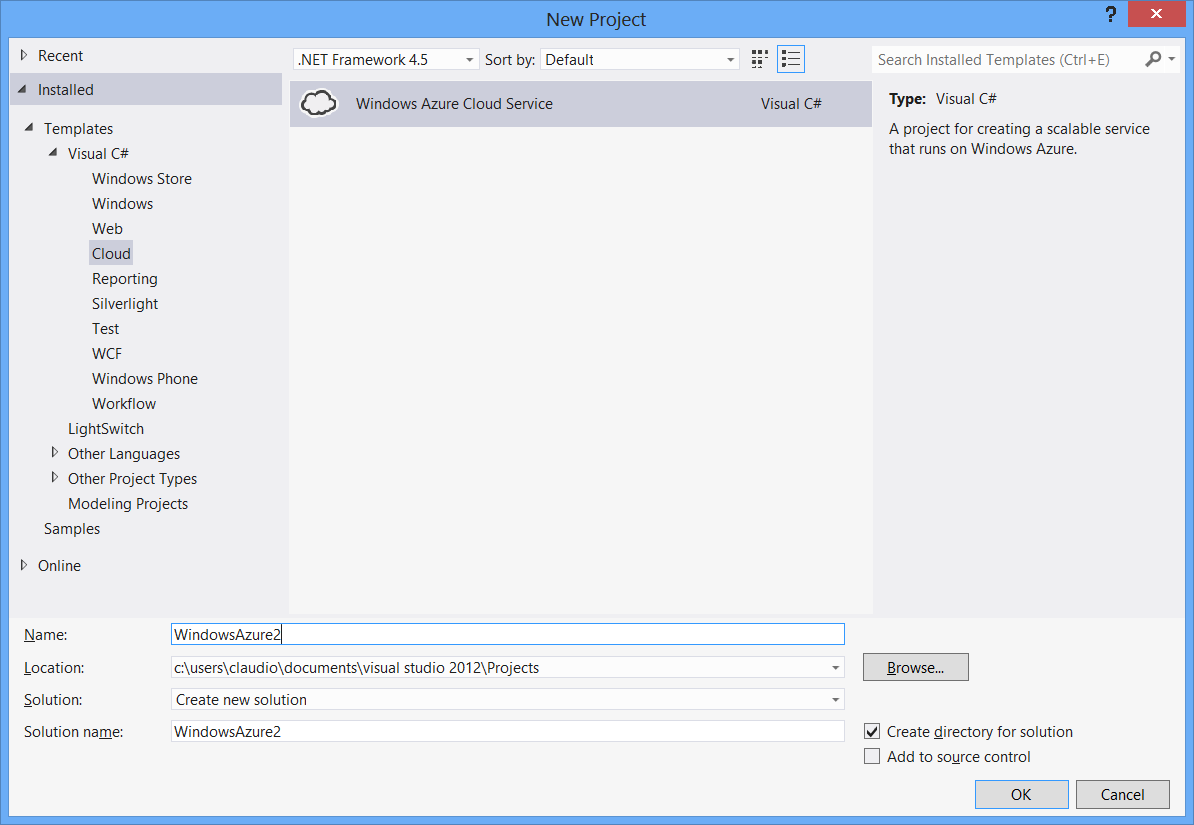
As you can see there is only a single template available. Select that template and fill in a project name and click on the OK button.
If you are used to creating projects for Windows applications there was nothing special till here. But after clicking on the OK button you’ll see a new dialog which looks like this:
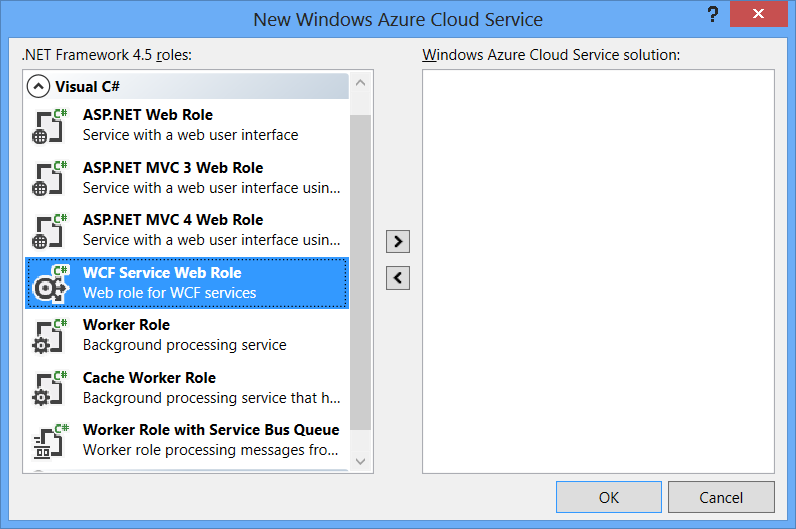 Within this dialog you can choose between different services types. We will use the WCF Service Web Role for our project.
Writing the service
Now that we have a new project opened, we can start coding our service. For testing purposes I recommend to write a very simple service like producing random numbers or consuming a name as an input and returning a greeting message. I’ll provide you with such an easy implementation so you can just copy and paste, if you’re primarily interested in the technology and don’t care about the implementation details at this time.
[ServiceContract]
public interface IRandomService
{
    [OperationContract]
    int GetRandomNumber();

    [OperationContract]
    string SayHello(string name);
}

public class RandomService : IRandomService
{
    public int GetRandomNumber()
    {
        Random number = new Random();
        return number.Next(1, 1000);
    }

    public string SayHello(string name)
    {
        return string.Format("Hello Mr./Mrs. {0}", name);
    }
}
Take the time to double-check that the names of the files correspond to the class and interface names. This is not required, but helps to find or avoid boring errors.
Creating a package
The next step is a preparation before we can actually upload the WCF service to Windows Azure. Go to the solution explorer and right click on the service project. Now you have the option Package….
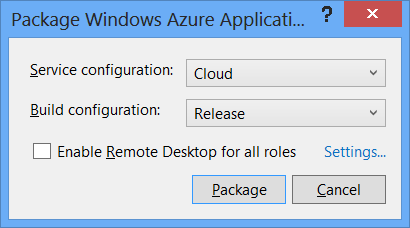
Just click on the Package button to start the process. After that, the folder which contains the created files is being opened automatically. It is the \bin\Release\app.publish folder within the path of your current solution/project.
You will see a .cscfg file which contains the configuration of the package and a .cspkg file which is the package itself. My package was about 7.6 MB and the configuration was only about 1 KB.
We will need those files in a few minutes when we deploy the service to the cloud.
Creating a Window Azure Cloud service
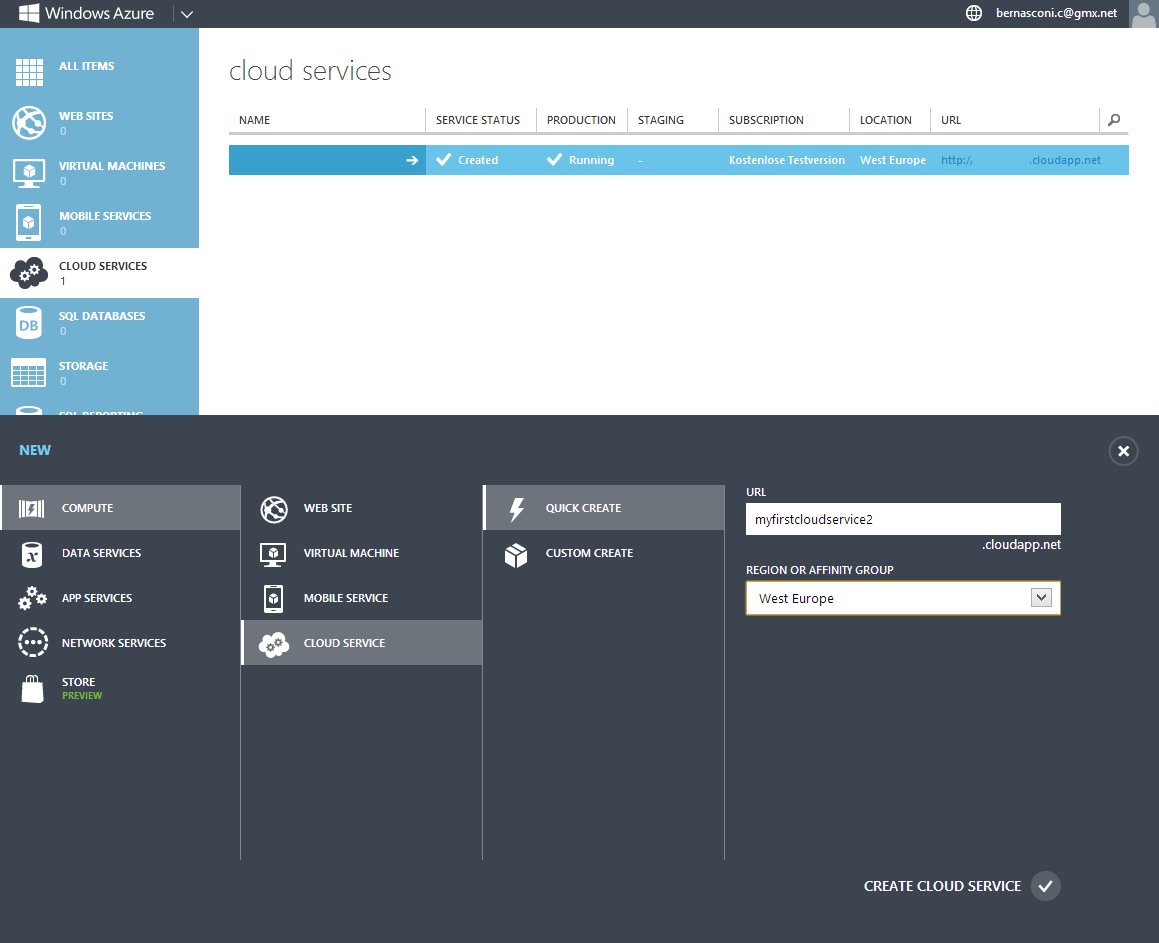
The next thing we need to do is to setup the environment on Windows Azure. I assume that you already have created an account as mentioned at the beginning of this article. If you haven’t you should do it right now.
Log in to your account and open the Windows Azure portal. You can now click on cloud service and create a new service as you can see on the following screenshot:
Deploy your service to production
When you have successfully created your cloud service, you are now able to install and deploy your WCF service to production. To do so click on “upload a new production deployment”.
Select the files from your local hard drive and upload them to Windows Azure. Be sure to check the checkbox on the bottom of the dialog.
It will now take two to five minutes to create your service. But once it is done, it should be directly available online. Further updates will be faster. I guess this is because the infrastructure is already initialized and configured. But for now, please check if your service is available with the following link: yourprojectname.cloudapp.net/RandomService.svc. You should now see a default page explaining how to create a client for the service.
Congratulations! You have deployed your first WCF service on Windows Azure!
Testing the WCF service
Yes I know, you don’t trust me and it’s okay! Let us test the service we have just created with a tool called WcfTestClient. This tool comes with Visual Studio. If you don’t have it installed, you can get it online.
You find the WcfTestClient.exe in the following path: C:\Program Files (x86)\Microsoft Visual Studio 11.0\Common7\IDE\WcfTestClient.exe
Open the WcftestClient.exe and right click on My Service Projects and add the url to your service. You should now see the following screen:
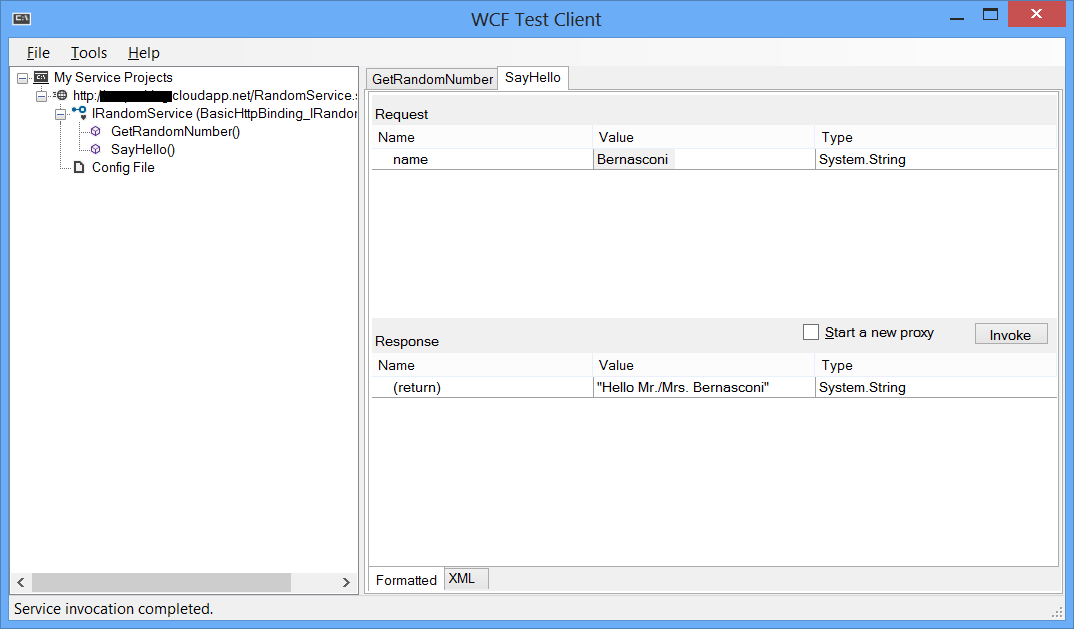
As you can see on the right side of the window, the service has been executed by pressing on the Invoke button and the service has resulted a string containing the sentence we expect.
Conclusion
We have successfully setup our first WCF service on Windows Azure within a very short time. If you haven’t done it before I really recommend to try it, just to get a feeling for how simple it is and which possibilities it offers.
I currently use a PHP service for one of my projects, because I was able to run the script on my web hoster for a low price. Since I am now able to publish a WCF service written in C# in such a short time and using the debugging capabilities provided by Visual Studio 2012, I definitely consider upgrading my service and change from a PHP implementation to a C# WCF service implementation.


Nice article
Thanks Claudio! Great and simple way to deploy a WCF service to Azure quickly. Your steps worked like a charm. However, a Storage Account may be required to deploy the service: Azure Portal -> Storage Accounts – > Add