
This video is part of The FREE Blazor Crash Course. In this crash course, we build an actual Blazor WebAssembly application based on .NET 5.
Table of Content
- The FREE Blazor Crash Course – Getting Started
- Blazor Form Component & Validation
- Blazor API Handling
- Blazor Modal Dialog Component
- Blazor CSS Handling
- Static Images (this article)
- Building a Dashboard
- End-to-End Testing using SpecFlow
In this video, we will learn how to add static images to a Blazor application. We will use it to add a logo to the FinanceMentor application to make it look more professional.
How to Add Static Images to a Blazor Application?
First, let’s talk about how we can use images in a Blazor application. In the last part of this Crash Course, we learned that global CSS files are stored in the wwwroot folder.
Images can also be stored in and referenced from the wwwroot folder. Let’s create an images folder. Next, we add the image we want to use as a logo to the folder. I usually do that outside of Visual Studio in the Windows Explorer.
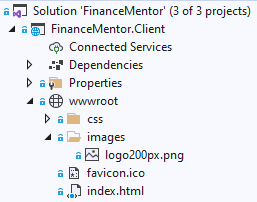
Blazor App: Static Image in wwwroot folder
Back in Visual Studio, we can see the image in the images folder of the wwwroot folder in our Client project.
How to Use Static Images in a Blazor Application?
Now that we have the image in our Blazor project, we want to use it as a logo in the NavMenu component. Open the NavMenu component.
On the second line, we have the anchor tag that shows our application’s name on top of the NavMenu component.
Let’s add the image to the NavMenu component. We remove the name of the application, and instead, we insert an image tag as a child of the anchor tag and set its source property to the image name, including the images folder.
<a class="navbar-brand" href="">
  <img src="images/logo200px.png" alt="Logo" />
</a>
That’s it. Isn’t it very simple how to add images to a Blazor application? Let’s run the application.
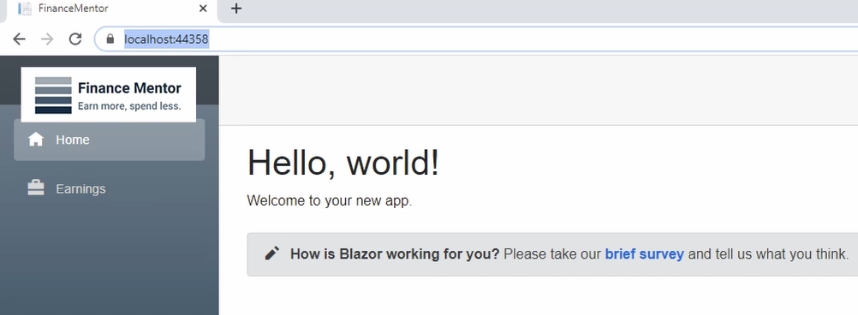
FinanceMentor: Misaligned header row
And there we have it. We have the logo in the top left of the application. However, as you can see, the layout is a little broken. Let’s fix that next. We want to have a horizontal line from left to right, and we want to move the menu items so that the first item isn’t behind the logo.
Fixing the Page Layout
Open the MainLayout.razor.css file. In the “.top-row” selector, we change the height from 80 pixels back to 3.5rem. This change makes our top row have the same size for the navbar and the content part of the page.
.top-row {
    background-color: #f7f7f7;
    border-bottom: 1px solid #d6d5d5;
    justify-content: flex-end;
    height: 3.5rem;
    display: flex;
    align-items: center;
}
Next, we want to move the menu items.
Back in the NavMenu component, we add a nav-menu class to the div containing the menu items. Now let’s add some CSS to define the nav-menu class. Open the NavMenu.razor.css file.
<div class="@NavMenuCssClass nav-menu" @onclick="ToggleNavMenu">
    <ul class="nav flex-column">
        <li class="nav-item px-3">
            <NavLink class="nav-link" href="" Match="NavLinkMatch.All">
                <span class="oi oi-home" aria-hidden="true"></span> Home
            </NavLink>
        </li>
        <li class="nav-item px-3">
            <NavLink class="nav-link" href="earnings">
                <span class="oi oi-briefcase" aria-hidden="true"></span> Earnings
            </NavLink>
        </li>
    </ul>
</div>
In the NavMenu.razor.css file, we add a CSS selector for the .nav-menu class and set the margin-top property to 25 pixels.
.nav-menu {
    margin-top: 25px;
}
By the way, we are using Blazor CSS Isolation here. If you are not familiar with CSS Isolation, watch the previous part of this Crash Course to learn about CSS handling and CSS Isolation in Blazor in great detail.
Let’s run the application again.
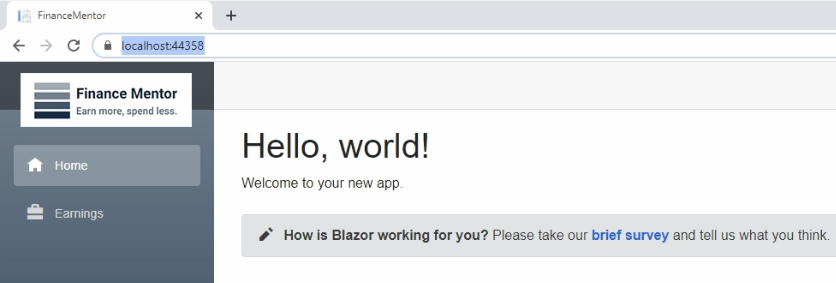
FinanceMentor: Fixed header row layout
As you can see, we fixed the issues with the page layout, and we now see a continuous line from left to right, our logo on the top left, and all the menu items are visible.
That’s it. Adding images as static assets to Blazor applications is simple.
Because we already learned how to add images to our Blazor application, let’s work on the FinanceMentor application to prepare it for the next episode, where we will build a Dashboard using a third-party user interface library.
Adding the Expenses Components
While earning money is fun, the reality is that we also have to spend money to survive. To keep things simple, we build the expenses part of the application similar to the existing Earnings page.
After learning so many new things in the last few episodes of this series, let’s apply what we’ve learned so far and implement the Expenses page.
Shared Project
Let’s start with the Shared project.
We add a new Expense class. This data class contains almost the same properties as the Earnings class. I’m going to copy and paste the content of the Earnings class. Not everything is the same. We use other categories for the Expense type.
That’s why we create another file called ExpenseCategory. I prepared a snippet for the ExpenseCategory enum type.
Server Project
Next, let’s continue with the Server project.
Again, this Crash Course focuses on Blazor web app development. I’ll be going through the server-side code quickly.
First, let’s create a new controller class and call it ExpensesController. I paste another snippet with the definition of the Get, Post, and Delete methods. Similar to the EarningsController, we use Dependency Injection to resolve an expenseRepository.
Next, open the SampleData.cs file. I paste the AddExpensesRepository method, which creates a MemoryRepository for the Expense data class. We also add sample items to the repository.
As the last change in the Server project, we use the AddExpensesRepository method in the Startup.cs file to register the repository in the dependency injection container.
Client Project
Now that we have everything set up in the Server project, let’s work on the Client project.
Let’s start by adding a new menu item in the NavMenu component. I paste the snippet for the menu item.
<li class="nav-item px-3">
  <NavLink class="nav-link" href="expenses">
    <span class="oi oi-dollar" aria-hidden="true"></span> Expenses
  </NavLink>
</li>
Next, we need to implement the page we reference in the href attribute of this menu item.
We create a new Razor component in the Pages folder and call it Expenses. For now, the page will look almost the same as the Earnings page. Let’s copy and paste the content of the Earnings page and adjust the parts we need.
First of all, let’s change the routing address defined using the @page directive on the first line to “/expenses”. Remember, this makes our page routable using the specified address.
Next, let’s change the title of the page on line 11. That’s everything we need to change in the template for now.
However, in the code section, we replace the Earning type with the Expense type and rename the fields. We also need to change the API address on lines 71 and 94.
Next, we need to implement the ExpenseForm component.
Again, we create a new component in the Components folder, name it ExpenseForm and copy the code from the EarningForm component over.
Let’s change the title on line 6 and the type of the enum type for the category selection in the component template.
In the code section, we change the model type to ExpenseModel, and we also change the API call on line 50.
Next, we need to create the ExpenseModel class in the components folder. Again, we create a new class and name it ExpenseModel.
We copy over the content of the EarningModel and exchange the type of the Category property.
Now, let’s start the application.
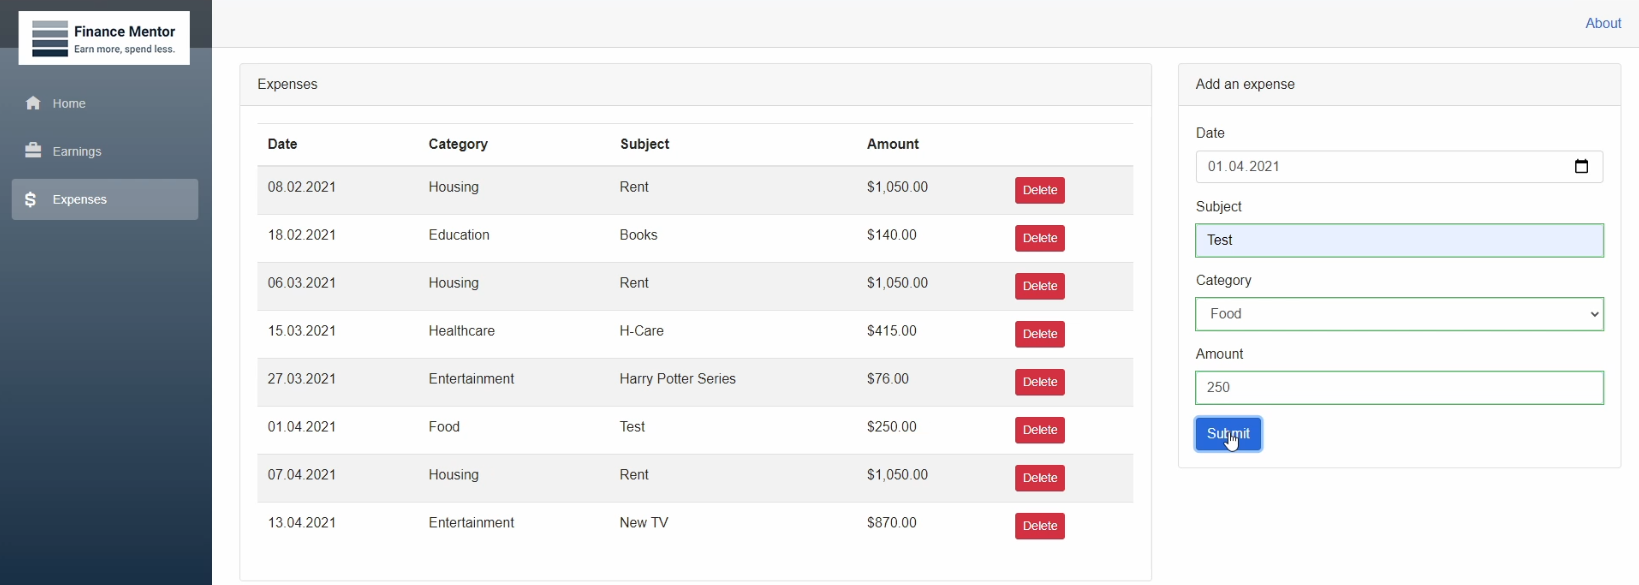
FinanceMentor: Expenses Page
As you can see, we now have a second menu item. If we click on it, we see the Expenses page.
Why We Copied so Much Code
You might wonder why I decided to copy and paste the Expenses part of the FinanceMentor application and only make slight changes to it. I don’t want to spend a lot of time building business code in this Crash Course.
However, I want to show the different building blocks of Blazor applications and how efficiently we can create new components and use them to extend our existing application.
There is almost no boilerplate code required to build and use components or pages. It is one of the reasons why Blazor also works great for larger codebases.
Summary
This video is the sixth part of the FREE Blazor Crash Course.
- You learned how to add images to Blazor applications.
- You learned how to use an image within a Blazor component.
- You repeated how to create Blazor components and pages.
What’s Next?
In the next video of this series, we integrate a third-party user interface library to build a Dashboard for the FinanceMentor application.
Tell me in the comments below what you think of Blazor so far. Do you consider using it in a future project?


