
Usually, when we see Blazor components, the C# code handling the interaction for the component template is placed below the template within the same .razor file.
However, there are other ways to implement Blazor components. I will show two alternative approaches to splitting the template and the C# code into separate files.
Reasons for Separating Code and Template
Let’s talk about how to implement components.
The concept of having the template and the code within the same file is widespread when working with React or similar web frameworks.
However, many .NET developers are used to using MVVM or MVC, where we separate the template or view from the code handling the interaction.
While I believe most of the time, putting the template and the code within the same razor file makes a lot of sense for most Blazor components, there are reasons when splitting can make sense.
- Component Size. When the component template already has many lines of code and splitting it into sub-components doesn’t make sense, you can tidy things up by having the C# code in a separate file.
- Separation of Concerns. The template is responsible for defining the user interface, while the C# code is responsible for implementing the component’s behavior. Separating them into different files can make it easier to read and maintain the code.
- Personal preference. It’s also a valid reason if you prefer having separate files. In this case, I would say it’s best to use the same way to implement components for the whole project or have rules in place that define when to use which approach.
We could also talk about reusability and testability, but the three reasons I mentioned are the most important, in my opinion.
Now that we understand why we want to split the code, let’s see how.
The Code-Behind Solution
Let’s explore the code-behind solution first.
In this example, we have a TodoItemForm component that uses the built-in EditForm component to build a form to add a to-do item to a list of to-dos.
Splitting the form into sub-components doesn’t make sense because we do not want to reuse parts of the form. Also, this form is pretty simple, but imagine we have a few more fields.
First, we create a new C# file with the same name as the component. In this case, we name the file TodoItemForm.razor.cs. We follow a naming convention to make code-behind work.
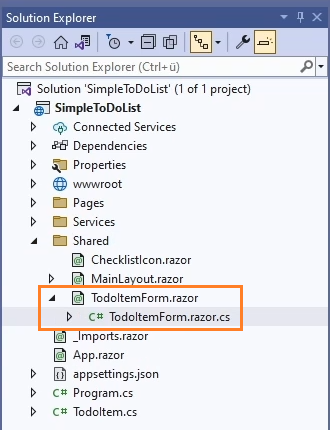
A perk of following the naming convention is that the Solution Explorer in Visual Studio shows the file as a code-behind file.
The most important part is that the class name is the same as the name of the Blazor component.
We see an error because the type already exists. We fix it by using the partial keyword to make the code-behind class a part of the Blazor component.
Next, we can move all the code from within the @code directive from the Blazor component into the code-behind file.
TodoItemForm.cs:
@using TodoAppBlazorServer.Services;
@inject ITodoService _todoService;

<EditForm Model="@NewItem" OnSubmit="@ItemAdded">
    <div style="display: flex; align-items: center; width: 400px;">
        <div style="margin-right: 10px">Text:</div>
        <InputText @bind-Value="NewItem.Text" class="form-control" style="margin-right: 10px" id="Item" />
        <input type="submit" class="btn btn-primary" style="margin-right: 10px" value="Add" />
        <input type="reset" class="btn btn-secondary" value="Clear" />
    </div>
</EditForm>
TodoItemForm.razor.cs:
using Microsoft.AspNetCore.Components;

namespace TodoAppBlazorServer.Shared;

public partial class TodoItemForm
{
    [Parameter]
    public required Action OnItemAdded { get; set; }

    private TodoItem NewItem = new TodoItem("");

    public void ItemAdded()
    {
        var newItem = new TodoItem(NewItem.Text);
        NewItem.Text = "";
        _todoService.Add(newItem);

        if (OnItemAdded != null)
        {
            OnItemAdded();
        }
    }
}
When we navigate back to the component, we can see that the references to the click handlers are still working properly.
There are handler methods attached to different properties. We also bind the value property of the InputText component to the NewItem object defined in the code-behind class.
Let’s start the application. We see that the form still works as expected.
Dependency Injection in Code-Behind
Let’s talk about dependency injection. We currently use the @inject directive in the TodoItemForm component. In the code-behind, this allows us to use the _todoService variable.
Instead of defining the variable using the @inject directive, we can also define it in the code-behind file. However, the syntax is completely different.
Let’s remove the @inject definition and open the code-behind file. In the TodoItemForm class, we now need to define the _todoService variable.
We create a private field. With this approach, we use the Inject attribute to tell Blazor to inject the service using dependency injection when initializing the component.
However, as you can see, the Inject attribute cannot be applied to a private field. We need to refactor the code to use a property instead.
TodoItemForm.razor:
@using TodoAppBlazorServer.Services;

<EditForm Model="@NewItem" OnSubmit="@ItemAdded">
    <div style="display: flex; align-items: center; width: 400px;">
        <div style="margin-right: 10px">Text:</div>
        <InputText @bind-Value="NewItem.Text" class="form-control" style="margin-right: 10px" id="Item" />
        <input type="submit" class="btn btn-primary" style="margin-right: 10px" value="Add" />
        <input type="reset" class="btn btn-secondary" value="Clear" />
    </div>
</EditForm>
TodoItemForm.razor.cs:
using Microsoft.AspNetCore.Components;
using TodoAppBlazorServer.Services;

namespace TodoAppBlazorServer.Shared;

public partial class TodoItemForm
{
    [Parameter]
    public required Action OnItemAdded { get; set; }

    private TodoItem NewItem = new TodoItem("");

    [Inject]
    public ITodoService TodoService { get; init; }

    public void ItemAdded()
    {
        var newItem = new TodoItem(NewItem.Text);
        NewItem.Text = "";
        TodoService.Add(newItem);

        if (OnItemAdded != null)
        {
            OnItemAdded();
        }
    }
}
I personally prefer defining the dependency in the template file because I have to type less, and I do not want to work with properties for my dependencies. But it’s good to know that this option exists.
The code-behind approach is well-known and widely used for ASP.NET WebForms and ASP.NET Core WebPages, both older .NET web technologies, and of course, WPF and other XAML-based applications.
Inheriting from the ComponentBase Class
The code-behind approach is a simple solution, but there is more. Let’s explore another approach to separate the template and interaction code of a Blazor component.
Similar to the first approach, we create a new file ending in .razor.cs. However, this time, we can choose whatever name we want. It doesn’t have to be the same name as the component. We name it TodoFormBase.
Next, we extend the class from ComponentBase to make it a Blazor component. Let’s move the code from the code-behind file into the TodoFormBase class.
TodoFormBase.cs:
using Microsoft.AspNetCore.Components;
using TodoAppBlazorServer.Services;

namespace TodoAppBlazorServer.Shared;

public class TodoFormBase : ComponentBase
{
    [Parameter]
    public required Action OnItemAdded { get; set; }

    public TodoItem NewItem = new TodoItem("");

    [Inject]
    public ITodoService TodoService { get; set; }

    public void ItemAdded()
    {
        var newItem = new TodoItem(NewItem.Text);
        NewItem.Text = "";
        TodoService.Add(newItem);

        if (OnItemAdded != null)
        {
            OnItemAdded();
        }
    }
}
We now have a C# class that represents a Blazor component. It contains interaction logic but no HTML template.
Now we have the TodoItemForm Blazor component with an HTML template and the TodoFormBase Blazor component with the interaction logic.
How do they know each other? The secret is it doesn’t.
TodoItemForm.razor:
@using TodoAppBlazorServer.Services;
@inherits TodoFormBase

<EditForm Model="@NewItem" OnSubmit="@ItemAdded">
    <div style="display: flex; align-items: center; width: 400px;">
        <div style="margin-right: 10px">Text:</div>
        <InputText @bind-Value="NewItem.Text" class="form-control" style="margin-right: 10px" id="Item" />
        <input type="submit" class="btn btn-primary" style="margin-right: 10px" value="Add" />
        <input type="reset" class="btn btn-secondary" value="Clear" />
    </div>
</EditForm>
We need to tell the TodoItemForm component about the interaction logic in the other class by using the @inherits directive. We add the line @inherits TodoFormBase to the TodoItemForm component to make a link between the two.
How Blazor Components Internally Work
So how do Blazor components work behind the scenes?
We learned that we could use the @code directive in a .razor file, or a separate .razor.cs file to write our C# interaction code.
What method we use to implement the C# code doesn’t matter.
The compiler turns our interaction code into a C# class that the .NET runtime executes at runtime.
Conclusion
In the end, it’s personal preference how you implement your Blazor components. However, it makes sense to have rules about when to use which approach.
Otherwise, you’ll end up with mix-and-matched components, which makes it harder to maintain the code.
I hope you learned at least one new approach to implementing Blazor components. Let me know in the comments what approach you like the most.
Check out the Blazor playlist to learn more about Blazor development, subscribe for more .NET content, and see you in the next video or the next article.
Source Code: https://github.com/claudiobernasconi/TodoAppBlazorServer


