
Do you want to create a new Blazor Server application and authenticate it using Azure AD?
What sounds simple cost me a whole day to figure out. In this video, I will show you how I made it work.
Create a new Blazor Server Application
First of all, in Visual Studio 2022, we create a new Blazor Server App. Enter a project name, choose its location, and press Next.
Use the latest .NET Version and, most importantly, choose Microsoft Identity Platform as the authentication type and create the project.
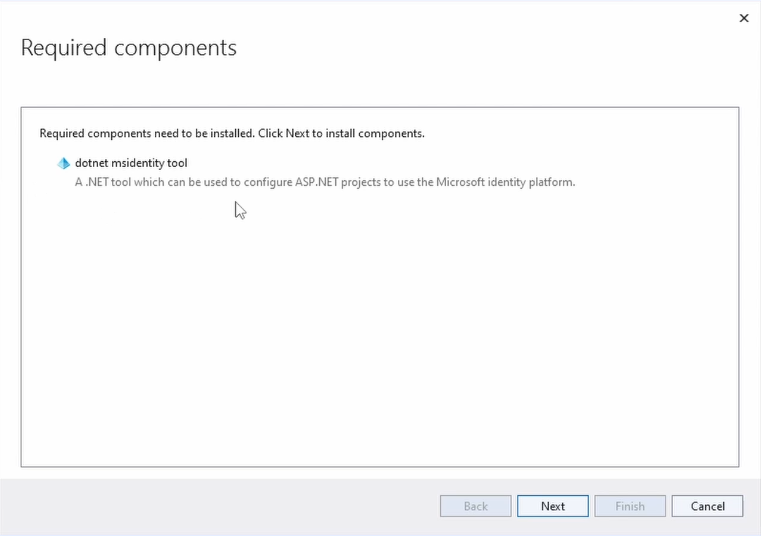
After Visual Studio created the project, it opens the Required Components dialog and lets us know that it wants to install the msidentity tool. We click Next.
On the next screen, we need to choose the App Registration within Azure AD. We first select between all the available tenants we can access with our logged-in Microsoft account.
Note that I’m not going to explain how to set up an Azure AD tenant or how to create users. I assume you already have a tenant set up and at least one user we can use throughout this tutorial.
I don’t want to use one of the existing app registrations but create a new one instead.
We select the tenant we want to use and click on Create new. We enter a Display name and press Register. After a few seconds, we select the newly created app registration in the table and click Next.
We can now add Microsoft Graph permissions or add permissions to additional APIs. For this basic example, where we only want to authenticate a user, we don’t need to add any of those and click Next.
Another note: This way of setting up a new App Registration will allow all existing Microsoft accounts to authenticate with your app. If you want to restrict access to your organization, meaning only accounts within your Azure Active Directory should have access, you have to edit the app registration after the fact using the Azure Portal.
Or you create your App registration using the Portal, which allows you to restrict it to accounts from your organization when creating the app registration. Let me know in the comments if you want me to record a video where I explain app registrations in more detail.
The focus of this tutorial is on making it work from a developer’s perspective. You should educate yourself or work with professionals to publish an app for production.
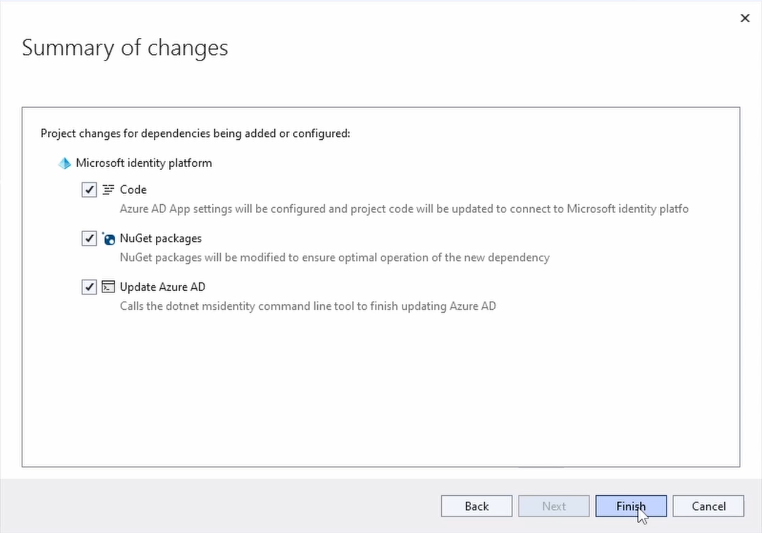
The Summary shows us that it will change the project by adding additional code, installing NuGet packages, and updating Azure AD to make our app registration work with our Blazor Server application. We press Finish and wait for Visual Studio to process the changes.
Building and Starting the Blazor Server App
We can now build and run the Blazor Server App. We get instantly redirected to the Microsoft login page, where we need to authenticate with a user.
When logging in a user for the first time, we need to accept permissions.
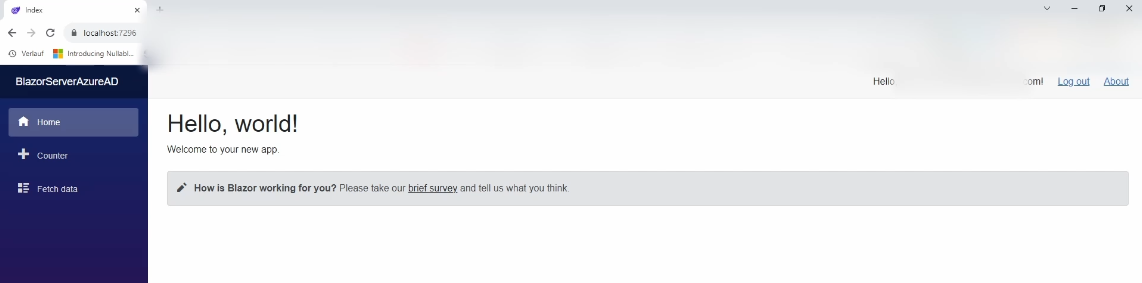
And there we are, in our Blazor Server application. It mostly uses the default Blazor Server app template that we know from other videos on my channel. The only difference is that by choosing Microsoft Identity as the authentication strategy, we also see the logged-in user on the top right.
We can navigate the app and access the different pages, such as the Counter page and the Fetch data page. We also have the option to log out using the Log Out button on the top right of the app.
Allowing Anonymous Access to the Home Page
One of the issues with the current implementation is that when starting the app, we are instantly redirected to the login page.
In some cases, it might be the desired behavior. However, for my use case, I wanted to make the home page available for everyone and let the user authenticate when clicking on a Login button.
We need to make a few code changes to achieve that.
First, let’s open the Program.cs file.
On line 22, we see the fallback policy set to the default policy. That line is what makes all incoming requests authorized according to the default policy. We remove this line to inactivate this configuration.
builder.Services.AddAuthorization(options =>
{
    // By default, all incoming requests will be authorized according to the default policy
    // options.FallbackPolicy = options.DefaultPolicy;
});
Next, we open the Counter page and add the Authorize attribute. We also do the same for the FetchData page.
@page "/counter"
@attribute [Authorize]
I start the application and make sure I am logged out of my account.
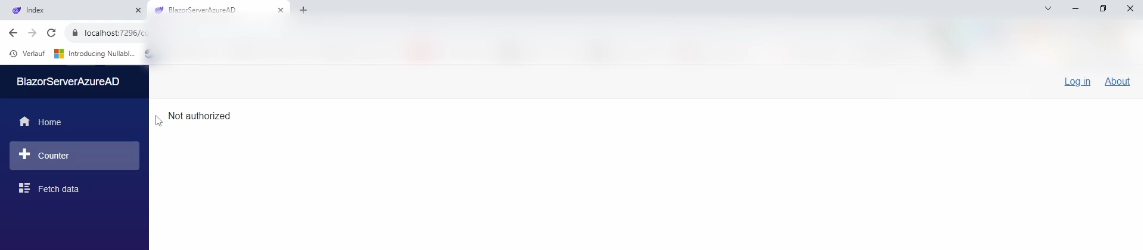
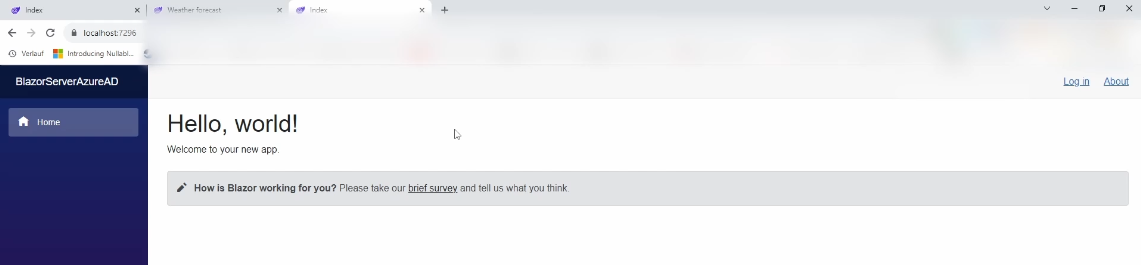
As you can see, we now see the Home page. Remember, we added the Authorize attribute on the Counter page and the Fetch Data page but not on the Index page.
When we try to navigate to the Counter Page, we get the message that we are not authorized to access this page. The same happens when we try to navigate to the Fetch data page.
Now, let’s log in again to see if we get access to those two pages.
I logged in, and as you can see, we can now navigate to the Counter and the Fetch Data pages again.
Showing Menu Items Only to Authenticated Users
The basic requirements are met. However, we want to further improve the user experience. The Not authorized text on the app when accessing a non-authorized route isn’t pretty.
Instead, we only want to show the menu items for the Counter and the Fetch data pages to authenticated users.
We open the NavMenu component and add the following code snippet.
<div class="@NavMenuCssClass nav-scrollable" @onclick="ToggleNavMenu">
    <nav class="flex-column">
        <div class="nav-item px-3">
            <NavLink class="nav-link" href="" Match="NavLinkMatch.All">
                <span class="oi oi-home" aria-hidden="true"></span> Home
            </NavLink>
        </div>
        <AuthorizeView>
            <Authorized>
                <div class="nav-item px-3">
                    <NavLink class="nav-link" href="counter">
                        <span class="oi oi-plus" aria-hidden="true"></span> Counter
                    </NavLink>
                </div>
                <div class="nav-item px-3">
                    <NavLink class="nav-link" href="fetchdata">
                        <span class="oi oi-list-rich" aria-hidden="true"></span> Fetch data
                    </NavLink>
                </div>
            </Authorized>
        </AuthorizeView>
    </nav>
</div>
We add an AuthorizeView component, including a Authorized section. Everything inside this component will only be rendered when a user is authenticated. If you want to show something else for unauthenticated users, you could do that using the NotAuthorized component. For this use case, we only need to put the two authenticated pages inside the Authorized component.
We start the app one more time. We are logged in, and we see all three menu items on the left, and navigating to each page is possible.
Now, let’s log out to see the app as a non-authenticated user.
As you can see, all we see is the Home page and the Home menu item on the left.
Conclusion
There is much more you can do with Microsoft Identity than shown in this tutorial. However, following this tutorial provides us with the basics to authenticate Azure AD users using a Blazor Server application.
We created a new Blazor Server App using the default Visual Studio template and selected Microsoft Identity as the authentication strategy.
Next, we went through the Microsoft Identity configuration wizard, set up a new App registration, and configured the app to use that app registration.
We then allowed unauthenticated access to the home page and only showed the menu for the Counter and the Fetch Data pages for authenticated users.
Make sure to subscribe for more content about .NET development.


