
This blog post is part of a blog post series. In this series, I am going to explain how I setup TeamCity on the Microsoft Azure cloud and how I integrated different types of applications for automated build, test, and deployment.
Also in this series:
- Free Azure Credits for Enterprise Developers
- Continuous Integration and Deployment of ASP.NET Core Applications
This particular article is focused on the installation of JetBrain’s TeamCity as a continuous integration software on an Azure Virtual Machine and its basic configuration.
Are you a friend of automation? Are you tired of doing the same thing over and over again? Great! Me too. I don’t like doing the same steps all over again. It is neither fun nor fool-proof.
And hey, I am a software developer. I want to write code and therefore I would like to deal with my infrastructure as less as possible.
The Goal
I will tell you how I setup a continuous integration and continuous delivery system for all my applications including many different types of applications such as ASP.NET Web applications, Angular applications, ASP.NET Core applications and Android applications.
The following steps are required to setup TeamCity on an Azure Virtual Machine:
- You need to have access to the Microsoft Azure portal. If you don’t have an account, you should immediately create one. (If your company is a Microsoft partner or has an MSDN subscription you might have free credits to spend each month. Make sure to check that.)
- We need to create a Virtual Machine in the Microsoft Azure portal. I go step-by-step through this as I want to prevent you from setting up the machine over and over again.
- We need to install TeamCity on the Virtual Machine.
- We need to configure TeamCity according to our needs.
Overview
I think it is important to understand what we build. We want to run TeamCity for our continuous integration builds. TeamCity needs to run on some infrastructure. Because we want it to run in the cloud and I like the Azure ecosystem we need a Microsoft Azure Virtual Machine.
The cost associated to the Virtual Machine is based upon RAM and CPU usage. If you think like me, you will ask what about the hard-drive? Azure has a model where the storage is paid separated from the Virtual Machine.
We need a storage account which can be attached to the Virtual Machine. In the instructions below I create a storage account while creating the Virtual Machine. The Azure portal has a simple wizard which helps us setting up everything we need at once. That’s a pretty cool experience by the way!
Choosing an operating system
For this article, I used Windows Server 2012 as the operating system. If you only want to build software that (also) builds on Linux, feel free to install TeamCity on a Linux server machine.
The most important reason why I decided to use Windows Server as the operating system is that I want to be able to build .NET Framework 4.6 applications. Those applications are made for Windows and I want to be able to build them on a Windows machine.
If you are not sure which operating system you should use, I would choose the operating system you are more familiar with. Or if cost is important to you I would choose Linux because it is a lot cheaper than the Windows based Virtual Machines.
If you install TeamCity on a Linux machine the installation and configuration might be slightly different. Please write a comment below this article if you would like to read a Linux version of this article.
Let’s jump right into the Azure portal and create our Virtual machine.
Create the TeamCity Virtual Machine
Log in to the Azure portal using your credentials. The first page you’ll see is the dashboard which holds all the important resources you already have. Let’s create a new resource by clicking on the green plus in the left corner of the screen.
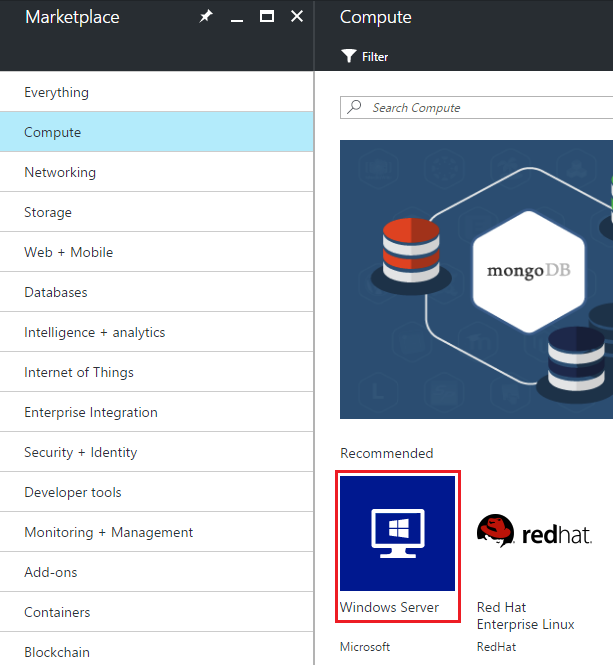
There is a friendly filter box where we can filter all the resources available to us. Azure has grown huge so if you type “Windows 2012 R2” you’ll still get many results. Luckily Microsoft has a set of recommended resources where “Windows Server” is listed in the first place. Click on it.
For this article, I decided to use a virtual machine running “Windows Server 2012 R2 Datacenter”. Feel free to choose a Windows Server 2016 operating system if you would like to. Click on the create button.
VM configuration step 1 – Basic settings
On the next screen, we can configure our virtual machine. On the first page, we can configure basic settings for our machine. Choose a name for the virtual machine that you can remember and choose a suitable disk type. For this article, I am going to create a virtual machine using an SSD disk.
Make sure to choose your subscription if you have one. Otherwise, choose the pay-as-you-go plan. Choose a username and a secure password. You will need both of them to connect to the virtual machine via remote desktop.
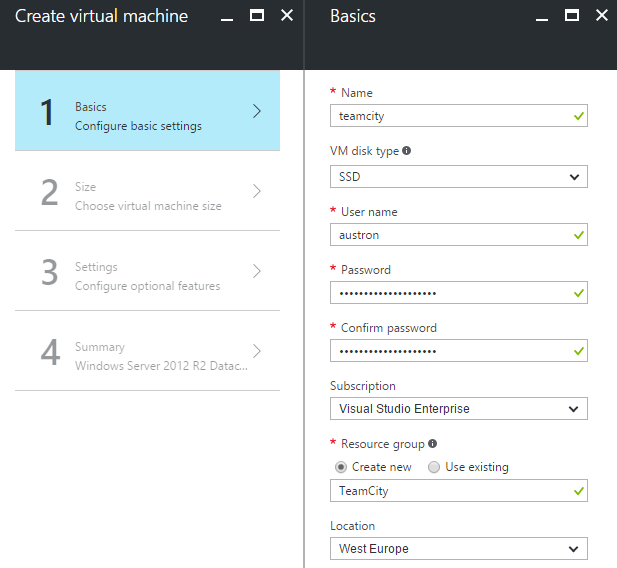
One last thing to mention on this first step is to choose a resource group. If you created a resource group before that, this is fine and you can select it from the existing resource groups. However, chances are that you have not created a resource group in advance. Go ahead and type a name for your resource group in the field and it will be created for you as you go. Resource groups are great to group your Azure resources logically. I would make use of them. They help you organize your resources.
Also, make sure to select the Azure data center located next to your workplace. In my case, it is West Europe.
If you’re ready, click on the OK button to proceed to the second configuration step.
VM configuration step 2 – Hardware
Step two is focused on the hardware selection. In my case, there is a collection of 27 different types of virtual machines. Luckily I just want to get started so I go with the “DS1_V2 Standard” which is the cheapest for me.
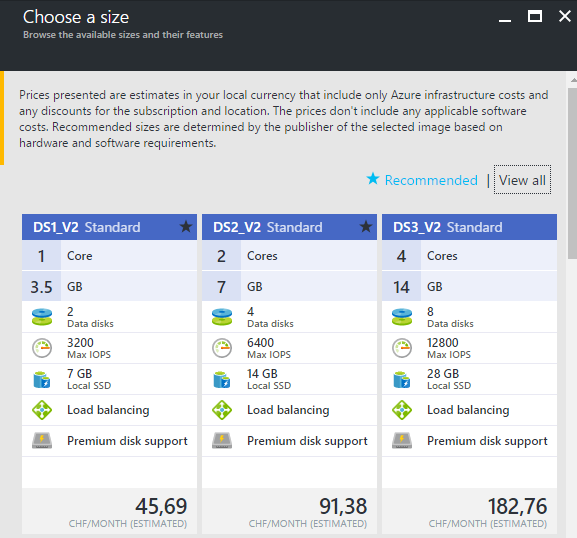
Prices can greatly vary depending mainly on the selected Azure data center region and your current subscription. They are also subject to change. In February 2017, Microsoft lowered the prices for the F-series and for the A1 configuration, for example.
VM configuration step 3 – Optional Features
Step three let us choose and configure optional features for our virtual machine. For example, step three let us specify the name of our storage account. If you already have a storage account you can select it or you can create a new one. I did not have a storage account yet. Therefore, I created one and I did not change its suggested name.
Next, you can configure the network settings. For our purposes, we can stick with the default configuration. Also, we do not need any extension for our virtual machine nor do we need high availability.
Monitoring is enabled by default. I do not have any experience with it because luckily my virtual machines always start as expected. If you enable at least one Monitoring capability it will create a second diagnostics storage account for you. If you do not want that, you should disable Monitoring completely. This is exactly what I did.
Click on the OK button again to get to the summary step. You can now check whether the virtual machine settings are according to your needs and press the OK button one last time which eventually creates the virtual machine for us.
It takes a few minutes to create our virtual machine. You can track the progress in the notifications section of the page header. As soon as the virtual machine is created we see a new tile on the dashboard with the name of our virtual machine attached to it.
Connecting to the virtual machine
Once the virtual machine is created and provisioned we want to start the VM and connect to it. We can connect to an Azure virtual machine as we would connect to any on-premise server as well using a remote desktop connection.
The Azure portal has massively improved during the last year. Click on the new tile on the dashboard to open the virtual machine. By now, a simple click on the connect button is enough to connect to the virtual machine using remote desktop. (If you have a popup blocker installed you should turn it off for the portal.azure.com domain.)
You should see a dialog asking for the user information for the virtual machine. Enter the information you provided while configuring the virtual machine in the Azure portal. For me, it was the username “austron” and a secure password. Confirm the certification warning if there is one and congratulation – you successfully connected to your newly created virtual machine for the first time.
Basic software setup
For every virtual machine I set up, I want to install a small set of software that I like working with. For me this includes
You can install whatever software you like.
Installing TeamCity
We created a virtual machine on the Azure portal and we successfully connected to it. We are finally ready to install TeamCity. First, we need the installation package on our machine. Therefore we go to JetBrain’s website and download the windows installation package (782 MB).
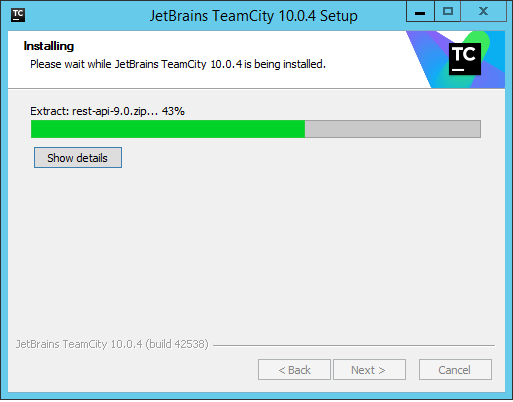
TeamCity’s setup wizard is self-explanatory and for our purpose, we can stick with the default settings. If you want to run multiple services on that virtual machine you could change the TeamCity server port. I choose the default port 80. At the end, there is a configuration screen for the build agent. It will be running on port 9090 per default and have the name “teamcity”. If you consider running multiple agents I would change the name to something more meaningful like “agent1” or “default agent”.
You can configure different user accounts for the TeamCity server and for each of its agents. For simplicity, I personally choose to run everything on the user account I created during the creation of the VM on the Azure portal. From a security perspective, this is not an ideal case and you should not do that if you plan to use this server for production purposes.
When the installation process is finished TeamCity opens in the browser. For the data directory location, I stick with the default settings once again.
There are five different database types supported. TeamCity highly recommends using one of the four “real” databases for production purposes. I might write an article in the future on how to setup a database on Azure to do so. But for this article, we choose the default internal “HSQLDB” database.
The last step is to create an administrator account for TeamCity. I choose another username and password for the administrator account than I did for the virtual machine and I recommend to do the same.
Just wait for a few more seconds and the installation is completed.
Saving money
If you don’t need your TeamCity to run 24/7 I highly recommend shutting down your Virtual Machine if you don’t need it. Azure Virtual Machines are billed by CPU and RAM usage by time. This means if the machine is not running, you don’t pay for it.
Remember that it is no enough to log out from the Virtual Machine or close the remote desktop connection. You have to stop the virtual machine in the Azure portal. Otherwise, it will still be running and you will be billed for it.
Microsoft lowered its pricing for the F-series and the A1 virtual machine type in February 2017. It is worth taking a look. You can also change the type of your virtual machine after you created it.
If you do not need instant feedback or want to save money instead of time consider using a hard-drive based storage account. In the article above I setup the Virtual Machine using a solid-state drive based (Premium) storage account which will be more expensive, but faster.
In fact, according to the current pricing, you have to pay at least 20$ a month for a 128GB premium storage account. For a standard disk account with the same storage, you only pay around 6$ a month. This is a huge savings potential.
Last but not least you might already qualify for free Azure credits because of one of your (or your enterprises) MSDN subscription. I highlighted this possibility in more detail in a previous blog post.
Final thoughts
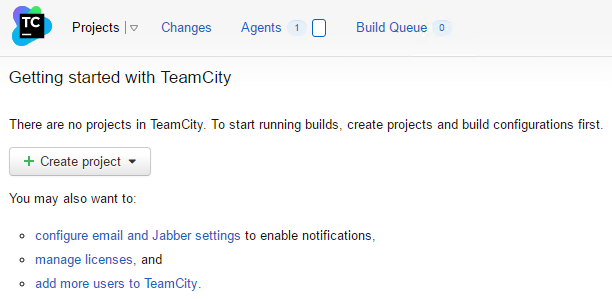
The windows installer makes it really simple to get started with TeamCity. The installation process is simple as well and the default values are well enough for a standard installation.
We successfully set up TeamCity and we are now ready to add projects to our continuous integration environment. This article is all about setting up the virtual machine on Azure and installing TeamCity.
This article is part of a series of blog posts about using TeamCity as a continuous integration and continuous deployment service. Depending on the kind of application you want to build you need different settings and maybe additional software on your virtual machine. I will write about how to integrate Android applications, ASP.NET Core applications, Applications for .NET 4 Framework and an Angular Web application.
Also in this series:


