
This video is part of The FREE Blazor Crash Course. In this crash course, we build an actual Blazor WebAssembly application based on .NET 5.
Table of Content
- The FREE Blazor Crash Course – Getting Started
- Blazor Form Component & Validation
- Blazor API Handling
- Blazor Modal Dialog Component
- Blazor CSS Handling
- Static Images
- Building a Dashboard
- End-to-End Testing using SpecFlow (this article)
In this video, we will add end-to-end user interface testing using SpecFlow to our Blazor application. First, we will install the required packages. Then, we implement a few test scenarios to see SpecFlow in action.
Thanks to my friends at SpecFlow for sponsoring this video and this article.
We will use SpecFlow to create executable end-to-end tests for our Blazor application. Be aware that this video is not an introduction to SpecFlow.
However, if you are completely new to SpecFlow, I highly suggest watching my “Introduction to BDD using SpecFlow” video, explaining the foundation of using SpecFlow in great detail.
The Architecture of End-To-End Testing Blazor Applications
Now that we are on the same page let’s discuss the architecture of End-to-End testing Blazor applications.
Blazor applications are web applications that run in the browser. If we want to automate end-to-end testing, we need something that interacts with a web application.
A browser doesn’t care about what framework we use to create a web application. As long as it can execute the complied application, the browser is happy.
So what we need is a tool that lets us automate browser interaction.
Luckily, there is a well-working solution for that problem. Selenium is a tool that lets us automate browser interaction. Although it has been around for a long time, it is still widely used due to its robust implementation.
Test Project Setup
Let’s head over to Visual Studio. First of all, we want to add a test project to our solution. Right-click on the solution in the solution explorer and add a new project.
In the Add a new project dialog, we choose the MSTest Test project template and click on Next. We name the project FinanceMentor.Test and make sure to choose the right location for the project on the hard drive.
We click next again and select .NET 5 as the target framework. Finally, we click on Create, and within a few seconds, Visual Studio creates the project for us.
Selenium Installation
Now that we have a test project in our solution, we need to install Selenium. Open the NuGet Package manager on the FinanceMentor.Test project.
We enter Selenium.WebDriver in the search box. We install the first package that appears using the latest stable version.
In addition to the Selenium.WebDriver package, we also need to install a package for the browser we want to use for the automation. In this video, we will be using Chrome as our browser. Let’s select the Selenium.WebDriver.ChromeDriver package and install it too.
In my case, I install the latest version of the package because I have the latest version of Chrome installed on my computer. However, if you have an older version, make sure to select the correct version of the ChromeDriver package to avoid problems.
Simple Selenium Test Case
Now that we have Selenium installed, we want to create a simple browser automation test case. Let me insert a code snippet.
var url = "https://www.google.com";
var driver = new ChromeDriver(Environment.CurrentDirectory);
driver.Navigate().GoToUrl(url);
driver.Manage().Window.Maximize();
driver.Manage().Timeouts().ImplicitWait = TimeSpan.FromSeconds(10);
First of all, we define a URL we want to access. Next, we create an instance of the ChromeDriver and navigate to the defined URL. Next, we maximize the window. The last line specifies a timeout we need in future test cases.
Let’s execute the test.
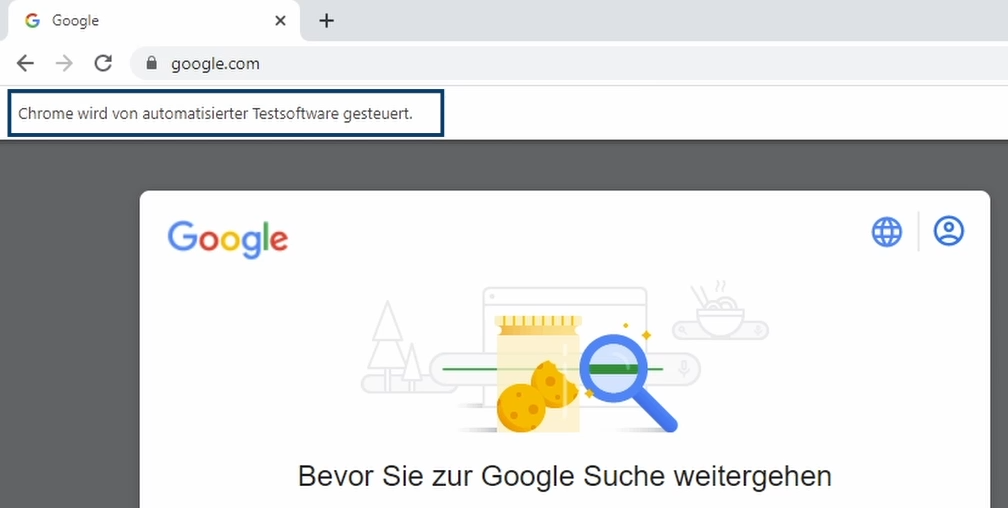
Google Chrome automated using Selenium
As you can see, it opens the chrome browser at the specified URL. Chrome lets us know that it runs in an automated test mode. Finally, we close the browser to get back into Visual Studio.
This video is no introduction to Selenium. I won’t go into more detail about using Selenium, but we will use it to create our SpecFlow scenarios soon.
SpecFlow Installation and Setup
Next, we want to install SpecFlow. Again, we open the NuGet Package manager on the test project and search for SpecFlow. We select the SpecFlow.MsTest package and install the latest stable version.
Again, this video is no introduction to SpecFlow. If you are completely new to SpecFlow, check out my “Introduction to BDD using SpecFlow” video.
Next, let’s go back to the Test project. Let’s create a new SpecFlow feature. We right-click on the project and add a new item. In the dialog, we choose the SpecFlow Feature File template in the SpecFlow section.
Let’s call the file BasicTests.feature and click on the Add button.
Implementing the First SpecFlow Test Scenario
We will start with a simple test scenario. I insert a snippet that defines a scenario to check whether the home page of our Blazor application is loaded.
Feature: Basic Tests

Scenario: App successfully starts
Then the home page is loaded
As you can see, the SpecFlow Visual Studio extension marks the Then step with a purple color, meaning that the step is not implemented yet.
We want to change that. We open the add item menu again and create a SpecFlow StepDefinitions file.
First, let’s remove the code generated by the file template that we don’t need. Next, let’s create a BeforeScenario method, copy the code from the existing UnitTests class over into the StepDefinitions file and import the missing types.
The BeforeScenario method will run before every test scenario gets executed. It ensures that we have a clean instance of the Chrome driver and the application is loaded before we execute the test scenario.
We don’t need the UnitTest1 file anymore and delete it.
Next, we add an AfterScenario method that will run after every test case. It’s important to call the Quit method of the Chrome driver after executing any test case. To make the Driver variable accessible from both methods, we introduce a class variable.
public sealed class StepDefinitions
{
    private IWebDriver Driver { get; set; }
    private const string url = "https://localhost:44358";

    [BeforeScenario]
    public void BeforeScenario()
    {
        var url = "https://localhost:44358/";
        Driver = new ChromeDriver(Environment.CurrentDirectory);
        Driver.Navigate().GoToUrl(url);
        Driver.Manage().Window.Maximize();
        Driver.Manage().Timeouts().ImplicitWait = TimeSpan.FromSeconds(10);
    }

    [AfterScenario]
    public void AfterScenario()
    {
        Driver.Quit();
    }
}
Now that everything is set up, let’s implement the first Then step. I insert the following snippet.
[Then(@"the home page is loaded")]
public void ThenTheHomePageIsLoaded()
{
    var NavMenu = Driver.FindElement(By.Id("navmenu"));
    Assert.IsNotNull(NavMenu);
}
Again, we import the missing namespaces.
As you can see, all we do in this step is finding an element on the website with the Id “navmenu” and assert that the element we get back from the driver is not null.
To make it work, we need to set the Id in the NavMenu component. Open the NavMenu.razor file and set the “navmenu” id on the div containing the navigation items.
Next, we need to set the correct URL in the BeforeScenario method. When running the tests locally, I suggest running the Blazor application in the background without the debugger attached. Take the URL from it and insert it into the BeforeScenario method. For me, it’s the following URL:
- https://localhost:44358/
Let’s take the time to extract the definition into a const string variable. We don’t need the ScenarioContext in this example; let’s remove it.
Now that everything is set up, let’s execute the tests in the Test project. Right-click the Test project and select the Run Tests menu option.
A browser window will open, the test will be performed, and the browser will be closed. In the Test Explorer, we can see that our test case has been successfully completed.
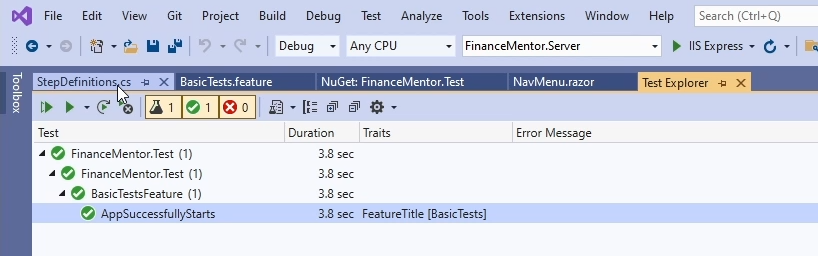
Completed SpecFlow Scenario Execution
Running Chrome Headless
We don’t need the browser to be visible while executing our tests. Let’s configure Chrome to run in a headless mode.
[BeforeScenario]
public void BeforeScenario()
{
    var chromeOptions = new ChromeOptions();
    chromeOptions.AddArguments("headless");
    Driver = new ChromeDriver(Environment.CurrentDirectory, chromeOptions);
    Driver.Navigate().GoToUrl(url);
    Driver.Manage().Window.Maximize();
    Driver.Manage().Timeouts().ImplicitWait = TimeSpan.FromSeconds(10);
}
We need to create a chromeOptions object and add a headless argument to it. Next, we pass the chromeOptions object as the second argument to the ChromeDriver constructor.
Let’s run the test again.
We will get the same result in the Test Explorer, but this time, we didn’t see the browser window appear while the test was performed.
Second Test Scenario
Now that everything is in place let’s add another test scenario to the feature file. I insert a code snippet that defines a test scenario that checks if the NavMenu is correctly rendered.
Scenario: NavMenu is correctly rendered
  Then the navigation contains 3 items
Again, the Then step is purple, meaning we need to implement a new step in the step definitions file. If you have the SpecFlow Visual Studio extension installed, you can press F12, and the method definition is copied to the clipboard.
In the step definition file, we insert the code and rename the parameter to itemCount. Next, I insert a code snippet that uses XPath to query the menu items in the document object model of the website.
[Then(@"the navigation contains (.*) items")]
public void ThenTheNavigationContainsItems(int itemCount)
{
    var NavMenu = Driver.FindElement(By.Id("navmenu"));
    var NavMenuItems = NavMenu.FindElements(By.XPath("//li[contains(@class,'nav-item')]"));

    Assert.AreEqual(itemCount, NavMenuItems.Count);
}
Last but not least, we assert that the actual item count is the same value as the item count provided by the scenario definition.
Let’s execute the tests again.
As you can see, both test scenarios turn green.
Third Test Scenario
Back in the feature file, let’s add another test scenario. This time, we want to test if the earnings page is correctly rendered. The scenario reads as follows:
Scenario: Earnings page is correctly rendered
  Given The user is on the earning overview
  Then the page title is Earnings
Given the user is on the earning overview, then the page title is Earnings.
Again, we have two step definitions that we need to implement. I’m going to paste the implementation of both steps. Again, we use XPath to find elements on the website. In the Given step, we use the Navigate method on the Driver variable to navigate to a different URL on the website.
[Given(@"The user is on the (.*) overview")]
public void TheUserIsOnTheOverview(string route)
{
    Driver.Navigate().GoToUrl($"{url}/{route}s");
    Thread.Sleep(500);
}

[Then(@"the page title is (.*)")]
public void ThenThePageTitleIsEarnings(string pageTitle)
{
    var CardHeader = Driver.FindElement(By.XPath("//div[@class='card-header']"));
    Assert.AreEqual(pageTitle, CardHeader.Text.Trim());
}
We run the tests again, and our third test case turns green.
Interactive Test Scenario
By now, we all understand how to add new test scenarios and how to implement them. We always look for specific elements in the document object model of the website and assert that a given object is accessible.
However, we want to go even further with the following test scenario, which will be the last scenario we will implement in this video. Let me paste the scenario definition and go through the implementation together.
Scenario: Adding a new earning
  Given The user is on the earning overview
  When The user adds a new earning
  Then the new earning should be in the table
What we want to do here is that the user not only loads a page but also interacts with it. Furthermore, the user inserts values into a form and submits the form to the server. We want to assert that the new values are shown on the website after the user submits the form.
Let’s start by implementing the When step.
Let’s open the EarningForm component and set an Id to the root element of the component called earnings-container. We also need to set an Id to the submit button below. Last but not least, let’s open the Earnings page and set an id to the earnings table.
[When(@"The user adds a new earning")]
public void WhenAddAnEarning()
{
    var earningsContainer = Driver.FindElement(By.Id("earnings-container"));
    var earningsForm = earningsContainer.FindElement(By.TagName("form"));
    var subjectInput = earningsForm.FindElement(By.Id("subjectInput"));
    var categoryInput = earningsForm.FindElement(By.Id("categoryInput"));
    var amountInput = earningsForm.FindElement(By.Id("amountInput"));
    var submitEarning = earningsForm.FindElement(By.Id("submitEarning"));

    subjectInput.SendKeys("Painting Work: 2 Rooms");
    categoryInput.SendKeys("Freelancing");
    amountInput.SendKeys("355");

    submitEarning.Click();
}
First of all, we need to find the form on the website. We can use different methods. In this example, I use the FindElement method and use the Id to find the elements.
When we have access to the form fields, we need to insert values. We can do that by using the SendKeys method on the input elements. Last but not least, we use the Click method on the submit button to send the data to the server.
[Then(@"the new earning should be in the table")]
public void ThenTheNewEarningShouldBeInTheTable()
{
    var earningsTable = Driver.FindElement(By.Id("earnings-table"));
    var tableRows = earningsTable.FindElements(By.TagName("tr"));
    var containsPaintingWork = tableRows.Any(row => row.Text.Contains("Painting Work: 2 Rooms"));

    Assert.IsTrue(containsPaintingWork);
}
The second step we need is the Then step that verifies our data. Again, we need to locate the correct element by finding the earnings table. Next, we go through all the rows and look for the earning we created in the When step before. In the last line of this method, we use the Assert.IsTrue method to validate the existence of the earning object in the table.
Once again, we run all tests in the Test Explorer. And all four test scenarios turn green.
Summary
- We learned how to set up our Blazor application to perform end-to-end tests using SpecFlow. SpecFlow allows us to describe test scenarios with natural language. It helps to form a common understanding of the system between software developers, product owners, and testers.
- Automated end-to-end tests allow developers to cut the time required in release testing. It also prevents testers from manually performing the same test over and over again.
- Yes, running an automated end-to-end test takes a few seconds compared to running a unit test that only takes a fracture of a second to execute. However, you are going to use a lot more time if you manually perform those end-to-end tests.
Please, let me know in the comments below what more advanced test scenarios you could think of, and I might add another episode to this series.
If you want to learn more about .NET development, subscribe to this channel and see you in the next.


